In this blog you can learn building a docker image and uploading it to Google Container Registry, deploying a container on Cloud Run from Google Container Registry, and creating a Continues Deployment Pipeline using
Build Docker Image and Push it to Google Container Registry
Enabling Container Registry API
Login to your GCP web console select the project, search for Google Container Registry API and enable it.

Build Docker Image
Please install and initialize gcloud cli before following below process, refer to Installing Google Cloud Cli in this blog and set the project that you want to work on using below given command.
List all your projects using command gcloud projects list which will return all the projects with project Id, project name and project number.
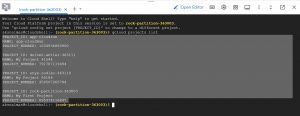
Set the project using the following command
“rock-partition-363003” is my project ID please use your project ID here.

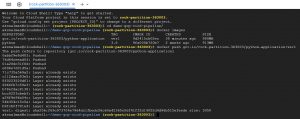
On your terminal go the file path where your Docker file is stored, and use the below command to build your docker Image, if you are new to docker please refer to Step-2 of this blog to learn writing a docker file and this blog to learn top-20 docker commands
above commands builds the docker image and the option “-t” will allow you to give a name for your docker image (name:tag) where tag is completely optional, python-application is image name and ver1 is the tag I am using(tags play an important role in continues deployment) and each gcp project gets a container registry named gcr.io/<projrct-id>
List all the available images using docker command “docker images”

Push Docker Image to Google Container Registry
Once you have built and tagged the local image , you can push it to container registry, follow below given structure to build your command.
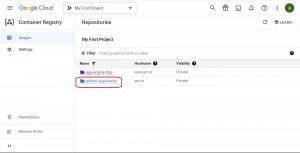
Now go to your google cloud web console and check for the uploaded Image.
Manual Deployment of Container Image from Cloud Registry to Cloud Run
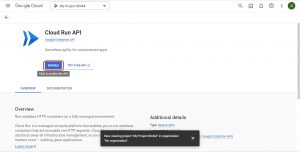
Enable Cloud Run API , on your gcp web console search for Cloud Run API and enable it
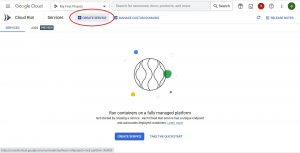
Now go to Cloud Run to create a new service , on your web console go to cloud run and follow below given steps
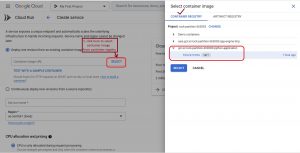
Then select the container image you to deploy to cloud run as shown in below snapshot.
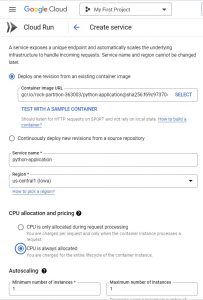
I opted to deploy from existing container as I am deploying manually this time , and do all the other configuration as your requirement and create the service , a snapshot of my configuration is given below.
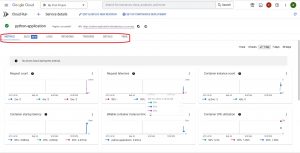
you will be redirected to the Service Details page , you can access your service once the deployment is completed using the given link

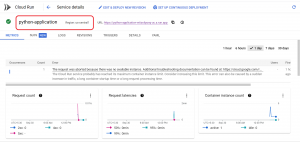
As cloud run is a managed service you will get all the performance , cpu utilization and many other metrics & logs directly without any need of installing a agent.
Create Trigger for Continues Deployment using Cloud build and Cloud Run
Enable API’s for source repositories and cloud build and give required permissions, on your web console go to cloud build Settings and give required IAM permissions.

Cloud Build enables you to build the container image, store the built image in Container Registry, and then deploy the image to Cloud Run.
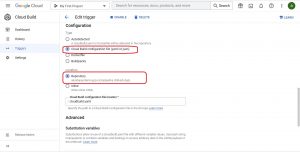
To build and deploy a container image you should have a configuration file which will have instructions for cloud build, go to your project root directory and create a configuration file named cloudbuild.yaml and write docker build steps to build and push it to Container Registry, and then add a gcloud build step to invoke the gcloud run deploy command which deploys the container image to Cloud Run.
Where SERVICE-NAME is the name of the Cloud Run services , REGION is the region of the Cloud Run service you are deploying, PROJECT_ID is your Google Cloud project ID where your image is stored, IMAGE is the name of your image in Container Registry.
you can get Service Name and Region from service datils page of cloud run.
below given configuration is my cloudbuild.yaml file.
cloudbuild.yaml
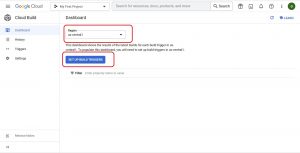
Once you are done with creating configuration file for cloud build, on your gcp web console go to Dashboards in cloud build, set the region and click on SET UP BUILD TRIGGERS
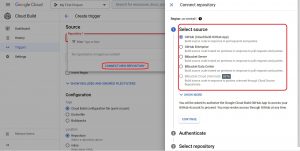
Give a name to your trigger and select the trigger event on which you want deployment should be triggered on
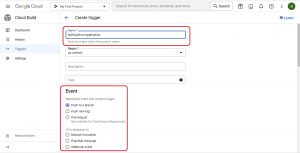
Select a source repository and authenticate it with cloud build.
Give your configuration file type and and file path , you can also write an inline YAML file, then HIT the create button , that’s it you have created an continues deployment pipeline using CLOUD RUN and CLOUD BBUILD